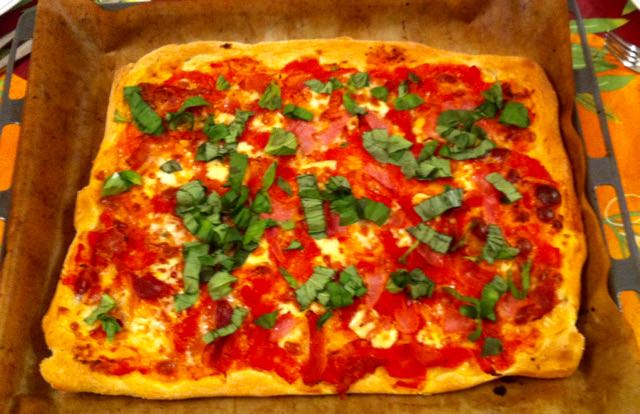
Pizza!
Recipe type: Buffet Food, Main Dish
Cuisine: Italian
Right, so this is going to be a longish blog post about how I sorted out my pizza problems. I’m not sure to what extent this is going to be applicable outside of France, but here goes 🙂
1. Flour
Most of the issue with pizza dough is getting the right kind of flour. Basically, you want your pizza dough to rise and hold that rise, and be chewy rather than flaky. This means gluten in the flour, a lot of it (the difference between cake flour and bread flour is the amount of gluten in it. Cake flour is low on it, bread flour rather higher. That’s why your cakes end up flaky).
France has a particular way of classifying flour, which…. mostly doesn’t tell you this. Flours are classified by weight of ash residue: T45, T55, etc. The higher the number after the T, the less refined the flour is. T80 (“farine bise”) is basically grey, T45 is white. The other info on the package is protein amount per 100g, which more or less corresponds to gluten… except that, the less refined the flour is, the more protein it will have–but not necessarily gluten! (see, it gets bloody complicated).
Let’s stick with T45 for the time being, since very refined flour is basically what you need for pizza. The protein amount you’ll need is around 11.5 or above. This is actually surprisingly hard to find on shelves, as most T45 flours will clock in at 10 or less. The only one I’ve found is “farine de gruau”, which *not* advertised as anything like bread flour, but rather as a premium flour for baking cakes. (the French supermarket idea of bread flour is prepackaged mixes that include the yeast. This doesn’t work for pizza because pizza dough takes very little yeast compared to bread).
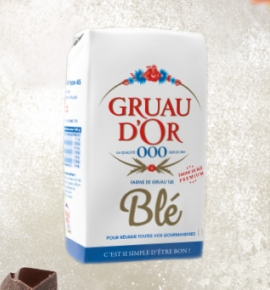
My pizza flour.
There is also actual pizza flour, though I’ve never been able to find that (there is I think one specialist Italian shop in Paris that sells it, but it’s too far away from my flat, I’m afraid…).
If living in the US or UK, you want bread flour (but be aware that these flours will take more water than French flour: you can safely add 10% extra water to amounts in the recipe).
2. Yeast
There are basically three kinds of yeast that you can find. Fresh yeast, which comes in little cubes and will keep for around 2 weeks in the fridge (or can be frozen). Active dry yeast, which is very stable medium granules (originally sold, I believe, for baking in hot countries), usually comes in tins, and needs to be re-activated by diluting into 37°C water for 10 minutes. And instant yeast, which is smaller granules, doesn’t need to be activated, but comes in packages and doesn’t keep well when you’ve opened the package.
The equivalence is around: 1 dose of fresh yeast = 0.5 dose of active dry yeast = 0.4 dose instant yeast. (instant yeast is mostly equivalent to active dry yeast: 1.25 dose active dry yeast = 1 dose instant yeast due to lower yeast activity).
I use active dry yeast because fresh yeast is hard to come by here (you can ask bakeries but it can be a bit of an uphill slog at times), and instant yeast is rather expensive and doesn’t allow me to modulate the amount of yeast I add to a dough (but instant yeast is way easier to find, I’ll note, since it’s for sale in most supermarkets. I have to go to a Lebanese shop to find my active dry yeast).
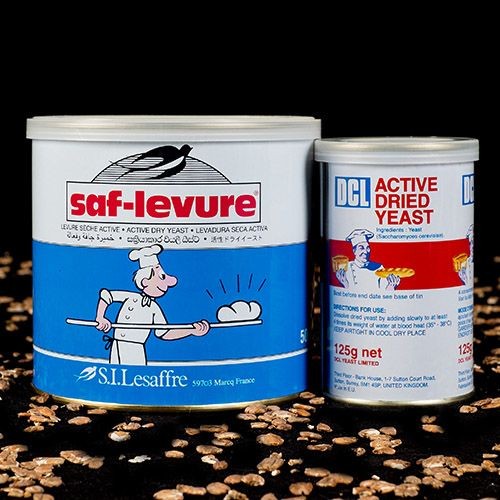
Active dry yeast.
3. Supplies
The only indispensable thing to the recipe is a dough scraper–it’s really going to make your job easier to get the dough from the bowl, and then from the counter. I use these ones from Bakery Bits (which has fantastic baking supplies if you’re in the UK), but you should be able to find some easily and cheaply (they double as dough cutters, but you won’t need this function, so get them plastic if you can, for scraping the bowl).
(ok ok, you’ll need a big salad bowl and a kitchen counter, but I’m assuming you have that somewhere already :p)
4. Pizza dough
The classic Neapolitan pizza dough doesn’t have sugar (or olive oil). It’s also cooked at very high temperature in a stone oven, which I’m assuming most people don’t have! The recipe I use has a bit of sugar in it, which helps caramelise the crust in the oven. You do need a hot oven, though. A lot of domestic ovens don’t go above 250°C–that’s the temperature you want if possible–I’m lucky enough that my oven can be cranked up to 275°C! When you open the oven, it’s important that you slide the pizza in and close it as fast as possible, because oven temperature drops precipitously in a matter of *seconds*, and you don’t want lower oven temps.
The key to good pizza dough is a long slow rise. That’s either 15 hours at room temperature, or 24 + hours in the fridge (I go for 24 hours in the fridge because I can make pizza one evening and bake it the next one. 15 hours would have me get up at 6am to make dinner!)
The amounts I’m giving here are for two 38 x 28 cm pizzas, which happens to be the size of the metal plate in my oven where I cook them. You are, of course, free to adjust as you see fit!
The other thing is that while you can of course knead the dough for 15 minutes until it all comes together, it’s actually not necessary. There’s a breadmaking technique called “stretch and fold” (demonstrated here by Peter Reinhart), which will save you a lot of energy. Basically, you stretch the dough in all directions (be prepared to make vigorous use of a dough scraper the first few times, as it will stick to your counter like a limpet), and then fold it back on itself. Watch the video and it’ll make much more sense.
If you’re a Craftsy member (and if you’re interested in cooking, they have a range of video lessons that are quite nice, so I’d recommend joining), you can take a look at Peter Reinhart’s pizza making class which is free (and while you’re at it, check out Brendan McDermott’s knife skills class, which is also well worth your time).
- 400g flour
- 1 tsp sugar
- 1 tsp active dry yeast
- ½ tsp salt
- 2 tsp olive oil
- 230mL water at room temperature
- Re-activate the yeast according to package instructions.
- In a bowl, mix a little of the warm water, 3 tablespoons of flour, and the sugar. Leave 5-10 minutes.
- Then add flour, olive oil, and sugar. Mix well.
- Do 4-5 stretch and folds at 5 minute intervals. Then add salt and mix well. The dough should be smooth and moderately sticky.
- Oil a bowl, put the dough in it. Cover with cling film, and leave to rise in the fridge for at least 24h (48h if you can. I never have the patience for this).
5. Toppings
I like to throw together a quick tomato sauce for the pizza. Still with those 38cm x 28cm dimensions, you can put together (for one pizza, so two pizzas is double that):
-400g passata or diced tomatoes
-1/2 onion, diced
-3 garlic cloves
-1 tablespoon sugar (to counter the acidity of tomatoes)
-3 pinches of salt
-dash of ketchup (for umami)
In a sauce pan on medium heat, cook onion, garlic and salt in oil (the salt makes the onions “weep” water). Then add tomatoes, ketchup and sugar, and cook on low heat until compact (usually 45mins or so for me).
Mozarella: count about 125g of mozzarella for one pizza.
Ham: around 60g of thinly sliced ham for one pizza.
Fresh basil: around 90g per pizza. Sprinkled *after* the pizza comes out of the oven.
6. Assembling
Get the dough out of the fridge around 1 hour before you start handling it (around the time you start on the sauce would be nice 🙂 ). Cook the sauce. If you’re going to use toppings that either render a lot of water or don’t cook fast, like vegetables, pre cook them.
Pre-heat your oven to 270°C (or higher if it goes higher).
Strictly speaking, the pizza should be put together and slid on a hot metal plate. With that length and shape, though, that’s rather unlikely to happen (but you can do wonders with a peel, I’m told). I put everything together on said metal plate and then slide it into the oven, which works OK.
Put some baking parchment on a metal plate. Gently degas the dough. Using your fingers, spread the dough “in the air” (using gravity to let the dough stretch on its own). When you can no longer handle it in the air, switch to the counter/the metal plate, and continue spreading it, still with your fingers (don’t use a rolling pin. It will burst all the gas bubbles and give you ultra flat pizza with no crunch). Transfer to metal plate. Garnish with tomato sauce, cheese, and toppings of your choice.
Let the garnished pizza rest for 5-10 minutes.
Then slide the pizza into the oven, at around 1/3 of the way down, and cook for around 10-12 minutes. It might be more or less depending on how thick it is, so keep an eye on the crust and stop when it becomes risen and golden.
(many many thanks to everyone who kept up with me while I was endlessly experimenting, both on FB and twitter. You know who you are 🙂 I don’t actually remember who recommended the Stretch & Fold Technique, but it was darn useful).